Quickstart: minimal round-trip (select → highlight)#
Goal: in one notebook, get a working loop where you select cells in the viewer and Python highlights those same cells back in the viewer.
This is the fastest sanity check that:
the iframe loads,
the server is reachable,
viewer → Python events are arriving,
Python → viewer commands are being delivered.
At a glance#
Audience
Wet lab / beginner: follow the “Copy/paste” cells and focus on “What success looks like”.
Computational users: also read “Common pitfalls” and “Troubleshooting”.
Developers: jump to Architecture: message routing (HTTP vs postMessage) and Reference (hooks, commands, schemas, endpoints).
Time: ~5–10 minutes
Prerequisites
A Jupyter environment (classic/JupyterLab/VSCode/Colab)
pip install cellucidAn
AnnDataobject namedadata(or a path to.h5ad/.zarr)
Note
If you don’t have an AnnData handy, you can still follow this guide using a pre-exported directory and cellucid.show("./export_dir").
Step 1 — Create and display a viewer#
Option A (most common): show an AnnData#
Run this in a notebook cell:
from cellucid import show_anndata

viewer = show_anndata(
    adata,
    height=600,
    dataset_name="My study",
    dataset_id="my-study-v1",
)
viewer
Option B: show a pre-exported dataset directory#
from cellucid import show

viewer = show("./exports/my_dataset", height=600)
viewer
Step 2 — Wait until the viewer reports “ready”#
Run this in a new cell:
viewer.wait_for_ready(timeout=60)
print("Ready payload:", viewer.state.ready)
Why this matters:
It confirms the viewer finished loading.
It makes later steps more reliable (you won’t race against initialization).
Step 3 — Make a selection in the viewer UI#
In the embedded viewer:
use any selection tool (lasso is usually easiest), or
click cells (depending on your workflow), or
use the UI’s selection/highlight features.
For a deep dive on selection tools, see the web app guide:
Step 4 — Block until Python receives the selection event#
Run this in a new cell. It will wait until you make a selection in the viewer:
event = viewer.wait_for_event("selection", timeout=None)  # wait forever
cells = event.get("cells", [])
print(f"Selected {len(cells)} cells (first 10):", cells[:10])
Important
Cell indices are 0-based row indices in the dataset that Cellucid is currently serving.
For a viewer constructed directly from
adata, indices refer to that object’s current row order.If you reorder/subset
adataafter creating the viewer, indices will no longer match what you expect.
Step 5 — Highlight the same cells back in the viewer#
Run:
if cells:
    viewer.highlight_cells(cells, color="#ff00ff")
You should see the selection become highlighted (exact visual style depends on the web app UI).
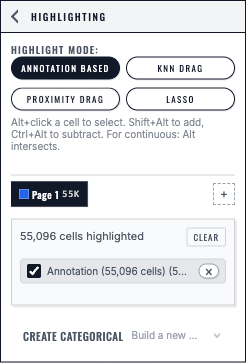
Highlighted cells are stored on a named page that can be used by analysis and session workflows.#
Optional: “reactive” style with callbacks#
If you prefer event-driven code, you can register hooks:
@viewer.on_selection
def handle_selection(event):
    cells = event.get("cells", [])
    print("Selected:", len(cells))
Important
Hook callbacks run when the viewer POSTs an event to the local server. In practice, that means callbacks can run in a background server thread.
Keep callbacks fast and defensive.
If you do heavy work (Scanpy, model inference), consider queueing the work and handling it outside the callback.
Common pitfalls (read before you debug)#
Nothing prints in Step 4: you haven’t made a selection that triggers a
selectionevent yet.Selection indices don’t match your
adata: your AnnData row order changed after the viewer started.Viewer construction raises or the iframe is blank: distinguish an exact web-generation startup error from a browser URL/mixed-content problem (see troubleshooting).
Troubleshooting#
Start here:
report = viewer.debug_connection()
report
Then use the symptom-based guide:
Next steps#
Commands catalog (Python → viewer): Python → frontend commands
Events catalog (viewer → Python): Frontend → Python events
Viewer state + waiting: Viewer state and wait_for_event
Session bundles (no-download): Session bundles: capture from the browser (get_session_bundle)